YouTube has grown into a hub where home cooks can share recipes, techniques, and creative kitchen ideas with the world.
Many creators have built successful channels simply by filming in their own kitchens, showing that passion and consistency matter as much as production value.
Still, to capture attention and maintain viewers, the right tools play an important role.
Starting does not require the most expensive equipment, but selecting reliable gear makes a big difference in how professional and enjoyable the videos feel.
With the right setup, any home kitchen can transform into a production-ready studio.
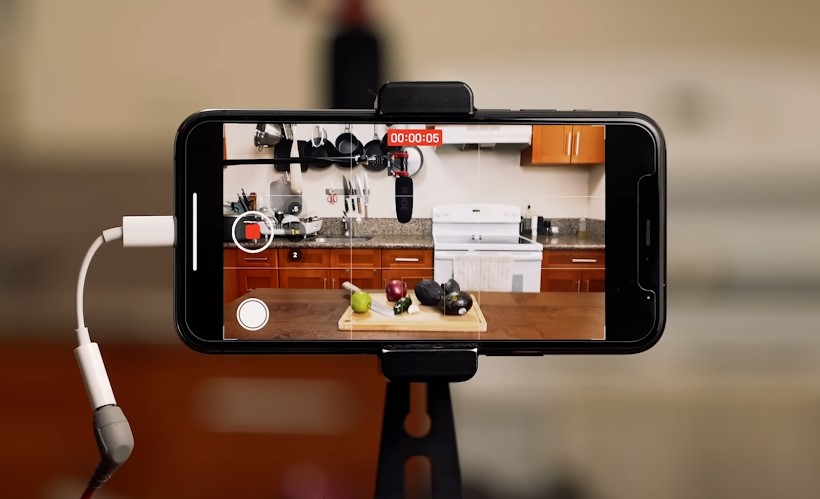
1. High-Quality Camera (or Smartphone with HD Capabilities)

Viewers engage with content that shows food clearly and vibrantly.
A DSLR or mirrorless camera offers versatility with interchangeable lenses and manual controls, but starting with a smartphone featuring HD or 4K recording capabilities is completely viable.
Consistency in resolution is more important than owning expensive gear, so prioritizing at least 1080p ensures every dish looks detailed and inviting.
Proper focus captures the steam, shine, and texture of meals, which can make the difference between a casual viewer and a loyal subscriber.
Key factors to consider:
- Resolution: 1080p minimum, 4K ideal.
- Autofocus speed and stability.
- Battery life and storage options.
- Ability to mount on tripods or rigs.
2. Tripod (Adjustable & Stable)
A stable recording base ensures smooth footage that keeps attention on the food rather than shaky frames. Adjustable tripods allow quick shifts between wide shots and close-ups. Investing in models with overhead arms lets creators capture top-down shots, an essential angle for cooking demonstrations. Having a tripod also eliminates the need for a second person to hold the camera, keeping production more efficient.
When selecting a tripod, focus on:
- Adjustable height and flexible head movement.
- Overhead extension capability.
- Weight capacity that matches your camera.
- Non-slip feet for stability on kitchen floors.
3. Lighting Equipment
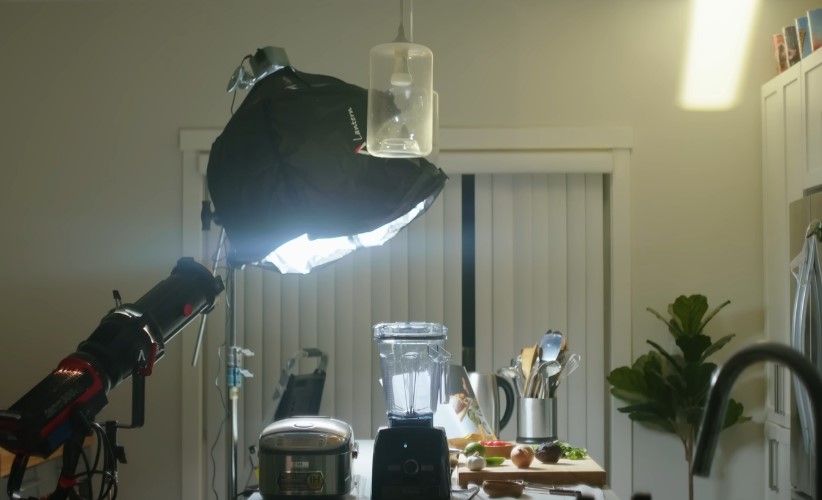
Food rarely looks appetizing without proper lighting. LED panels, ring lights, or softboxes provide consistent illumination, making every ingredient and dish pop on screen.
Natural daylight works, but fluctuating conditions can ruin consistency in longer shoots.
Artificial lighting gives full control and prevents dull or shadowy frames.
- Enhances food color and texture.
- Creates a polished, professional feel.
- Allows consistent recording regardless of time of day.
- Reduces heavy shadows and glare.
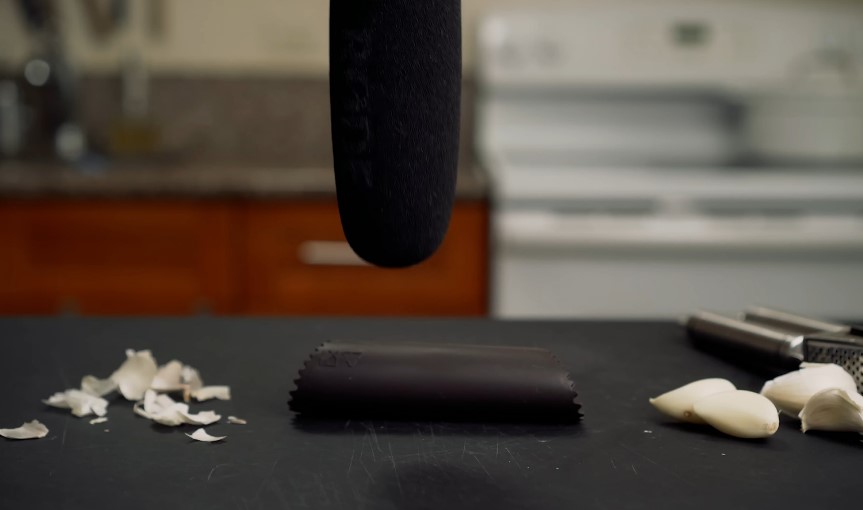
4. External Microphone
@chefjonnymarsh BTS of shooting videos! Something that was never in my agenda when I started all this and now is probably my favourite part of it all! #chef #bts #film #video #food #foodie #behindthescenes #easy #howto
Audiences can tolerate lower video quality, but poor sound often drives them away.
Kitchens naturally produce distracting noises, making an external microphone a crucial upgrade.
Lavalier microphones offer portability and clear voice pickup, while shotgun microphones capture focused sound from a specific direction.
Both options dramatically improve clarity.
Considerations for microphones:
- Lavalier: compact and discreet.
- Shotgun: directional, filters out background.
- USB or wireless options depending on setup.Windscreens to reduce popping or harsh sounds.
5. Video Editing Software
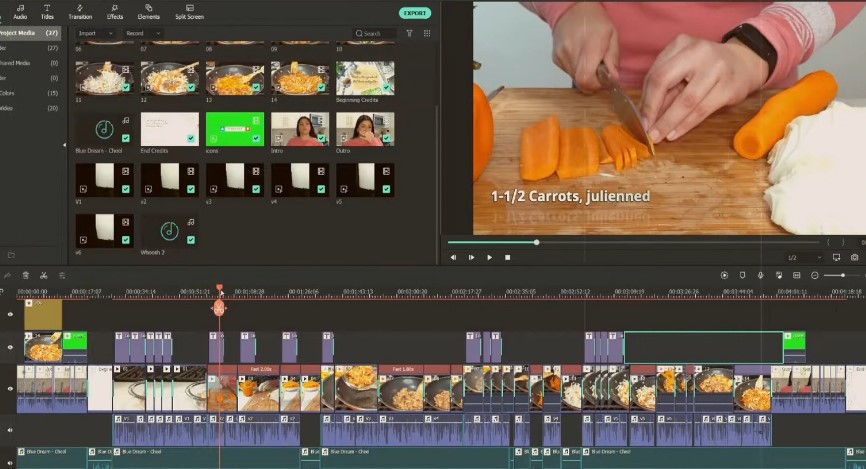
Uncut recordings often feel messy, so editing software polishes content into binge-worthy material.
Programs such as Adobe Premiere Pro, iMovie, Lightworks, and Clipchamp allow trimming, adding text overlays, inserting background music, and blending transitions seamlessly.
Mastering even basic editing tools helps creators maintain consistency and professionalism.
- Cuts errors or long pauses.
- Adds engaging elements like titles and graphics.
- Enhances flow with smooth transitions.
- Allows voiceover insertion and sound balancing.
Refined videos increase watch time, and that directly helps with channel growth and visibility. SocialWick, a social media platform, can help you with marketing your content properly, ensuring your polished videos reach the right audience.
6. Clean, Visually Appealing Cookware & Utensils
Every piece of cookware visible on screen shapes your brand’s style.
Worn pots or mismatched plates distract viewers, while coordinated and clean utensils enhance presentation.
Using neutral tones or colors that align with your channel branding maintains a consistent look.
Keeping separate “camera-only” dishes ensures everything always appears pristine.
Tips for cookware presentation:
- Stick to neutral or brand-consistent colors.
- Maintain separate dishes for filming.
- Use matching sets for plates and bowls.
- Choose props that highlight food rather than overshadow it.
7. Kitchen Setup (Background & Organization)
A clutter-free background makes your channel more watchable. Viewers want to focus on the recipe, not random items scattered across counters.
Organizing ingredients in advance, known as mise en place, keeps the process smooth on camera and reduces awkward pauses.
Selecting a background style that reflects your personality helps build a recognizable identity.
Suggestions for setup:
- Keep counters spotless and uncluttered.
- Store unnecessary items out of view.
- Prepare ingredients before recording.
- Use a style theme such as rustic, modern, or cozy.
Consistency in setup creates an environment viewers enjoy returning to with every new upload.
8. Overhead/Secondary Camera Mount or Arm
Multiple angles create dynamic content that feels more immersive.
Overhead mounts provide a direct view of chopping, mixing, or plating, while side angles capture reactions and commentary.
Even a smartphone mounted on an adjustable arm can serve as an excellent secondary shot.
- Adds variety to visual presentation.
- Highlights important cooking steps.
- Provides editing flexibility.
- Keeps viewers engaged with changing perspectives.
9. Audio Dampening Tools
Recording in kitchens often leads to echo due to hard surfaces. Adding rugs, curtains, or foam panels reduces this issue and enhances audio clarity.
Such improvements are especially helpful for voiceovers or live instructions.
Clean audio ensures viewers do not struggle to hear directions, building trust in your teaching style.
Ways to improve sound quality:
- Install foam acoustic panels.
- Add fabric-based items like curtains or rugs.
- Record in smaller sections to limit background interference.
- Position microphone closer to the source.
10. Backup Storage & Power Supply
Long filming sessions often strain both storage and power. External hard drives or cloud services safeguard raw and edited footage, preventing data loss.
Keeping spare batteries, chargers, or power banks ensures uninterrupted recording sessions.
Reliable storage and power solutions help avoid wasted time and lost recipes.
Important considerations:
- External drives with large capacity.
- Cloud options for easy access across devices.
- Extra batteries and chargers.
- Power banks for flexibility during longer shoots.
Summary
Quality gear sets the foundation for producing cooking videos that attract and retain viewers.
Starting small with a camera, tripod, and basic lights allows steady growth while leaving room for upgrades.
Over time, expanding into better audio, storage solutions, and multiple camera angles will refine the production process.
With consistent effort and the right equipment, a home kitchen can transform into a polished studio where creativity thrives and audiences return for every new recipe.
Hi there, my name is Kelly Barlow and kellytoeat.com is my blog. Here, I write about various recipes I want to reccommend to readers.
I try to find the best possible recipes that can attract the attention of readers, and at the same time, I strive to write it in the most engaging manner possible.
When I was younger, I wanted to become a chef. Sadly, it wasn’t meant to be, but at the very least, I write about it.