Leftover chicken tenders can go two ways. Either dry and rubbery or crispy and juicy like day one. Most people grab the microwave. That works in a pinch, but it rarely gives the best texture. Chicken tenders deserve better than soggy breading or tough meat.
Reheating should never feel like settling. A good method brings back the crunch, the flavor, and even makes lunch feel fresh again. No need for special gear or long prep. Every method listed here uses simple tools you already have at home.
Some methods take longer. Others focus on speed. A few strike the right balance between the two. Not every tender needs the same treatment. If you are working with fast food leftovers or homemade batches, the right approach can make all the difference.
Explore six reliable ways to reheat chicken tenders.
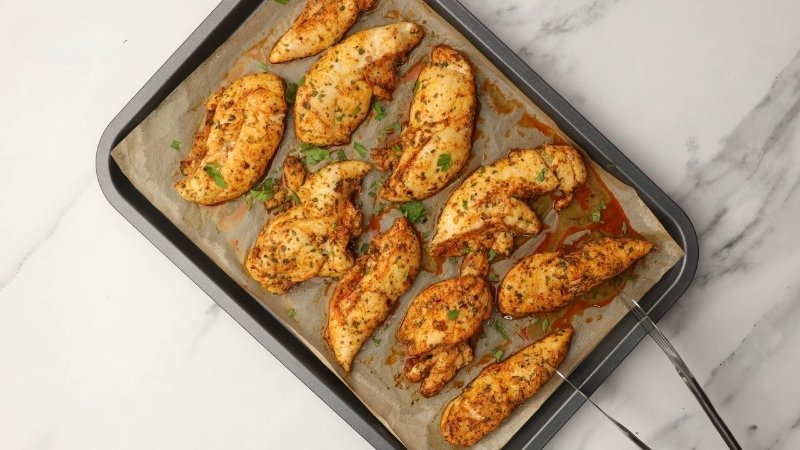
1. Oven Reheat – Best for Balanced Texture and Flavor
Rating: 9/10
The oven gives the best balance of crispness and moisture. No shortcuts. No weird aftertaste. Every bite feels close to day one. The downside is time. It is not for those looking to eat in under five minutes. But the results always justify the wait.
Step-by-Step Instructions
- Preheat oven to 375°F
- Line a baking sheet with foil or parchment
- Place a wire rack on top if you have one
- Lay chicken tenders in a single layer, spaced apart
- Reheat for 10 to 15 minutes
- Flip halfway through
- Broil for 1 to 2 minutes at the end if needed
When to Use the Oven
- Reheating after a night in the fridge
- Dealing with thick, breaded chicken tenders
- Wanting crisp texture, not microwave softness
- Prepping lunch ahead and not in a rush
Oven reheating is not for frozen tenders pulled straight out of the freezer. Thaw first, or the outside will look done long before the inside warms up. Also not great if you already microwaved them once. That extra moisture ruins the finish.
Pros and Cons
- Crispy exterior without frying
- Juicy interior stays intact
- No grease, no sogginess
- Great for larger batches
- Takes longer than any other method
- Needs an oven and proper tray or rack
- Not ideal for quick lunch breaks
Oven reheating takes effort and patience. You need to prep a pan, wait for the preheat, and monitor the flip. But if you care about texture and taste, this is the method that actually respects your food. Most people throw tenders in the microwave and wonder why they taste like rubber. The oven is the fix for that.
Once you try it, you will stop using the microwave unless forced to. It turns leftovers into a proper lunch. Not perfect, but closer than any other method.
Small Upgrade Tip
Brush each tender with a drop of oil before reheating. Garlic oil or melted butter works best. That adds shine, helps the breading crisp faster, and deepens flavor. It takes 30 seconds and changes everything.
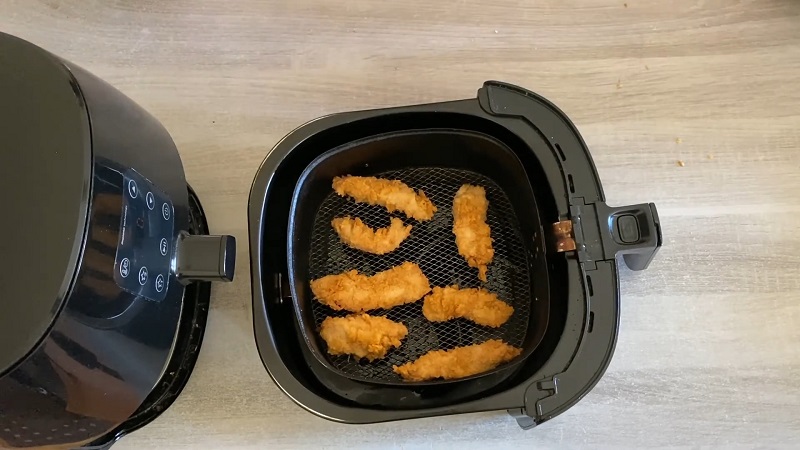
2. Air Fryer Reheat – Fastest Way to Get Real Crunch
Rating: 8/10
The air fryer does almost everything right. It heats fast, crisps fast, and does not need much effort. The outside comes back with solid crunch. The inside stays moist unless the tenders were dry to begin with. Texture beats the microwave by a mile. It runs second only to the oven.
Step-by-Step Instructions
- Preheat air fryer to 350°F
- Place tenders in a single layer with space between
- Reheat for 4 to 6 minutes
- Shake or flip halfway through
- Check crispness at the 4-minute mark
No need to add oil. Most tenders have leftover grease in the breading. That is enough to re-crisp in the air fryer. Still, if you like extra crunch, spray lightly with oil before starting.
What Works Best in the Air Fryer
- Fast food tenders with soft coating
- Smaller or thinner tenders
- Batches that need speed and crispness
- Tenders that already cooled completely
Avoid using the air fryer for chicken tenders that already dried out. The dry heat will make them worse. Air fryers also struggle with thick, juicy pieces if the model is small. The outside cooks too fast, and the inside stays cold.
When to Use the Air Fryer
- Lunch break with less than 10 minutes
- Quick dinner fix
- Reheating for one person or small servings
- Avoiding the oven heat in summer
Air fryers shine when time is tight. They do not beat the oven on moisture, but the gap is small. What they lose in texture depth, they make up in speed and ease.
Pros and Cons
- Quickest method with real crisp
- No oil or grease needed
- Easy to use and clean
- Great texture in under 6 minutes
- Can dry out thinner or overcooked tenders
- Needs space in the basket
- Not ideal for thick or large batches
- May cook unevenly in cheap models
The air fryer feels like cheating, in a good way. If you want something that looks and tastes decent with zero prep and under six minutes, this is the move. You do not get the exact crisp the oven gives. But you will not miss it unless you compare side by side.
No need to preheat long. No need to hover over it. Toss them in, hit start, and you are halfway to something that tastes freshly made. It is not perfect, but it is damn good for the effort.
Pro Tip
Shake the basket halfway through to expose more surface. Use foil under the basket only if your model allows it. If not, clean-up takes an extra minute but the result is worth it.
3. Microwave Reheat – Quick Fix With Mixed Results
Rating: 5/10
The microwave wins on speed but loses on texture. It heats fast, but the breading turns soft. The inside stays hot, sometimes too hot. Edges dry out, and the crisp factor is nearly zero. Still, if time is tight and expectations are low, it works well enough.
Step-by-Step Instructions
- Place tenders on a microwave-safe plate
- Lay a damp paper towel over the top
- Heat on medium power (50 to 70%)
- Reheat in 30-second bursts, checking each time
- Total time: 60 to 90 seconds
What Works Best in the Microwave
- Fast food tenders
- Thinner pieces
- Small batches
- When absolutely no time is available
Avoid this method for thick, juicy chicken tenders. The microwave will heat them unevenly. The outside dries out before the center warms. Also skip this if the breading matters. Soft coating will not recover in the microwave.
When to Use the Microwave
- You have less than 2 minutes
- No oven or air fryer available
- You do not care about texture
- You only want the food hot and fast
Pros and Cons
- Fastest method overall
- No special equipment needed
- Works in any kitchen or office
- Best for emergencies only
- Texture loss – no crunch at all
- Breading turns soggy or soft
- Edges can overcook or turn rubbery
- Never tastes close to fresh
Microwave reheating is survival mode. It works, but only barely. The food gets hot, and that is about it. It will not impress anyone. You lose the crunch. You lose the flavor clarity. But you get speed.
Use it when you are in a rush or at work with no options. Eat it quickly before the texture gets worse. That is the only way to get something edible out of it. Reheating tenders in a microwave is like using a plastic fork for steak. Technically possible, but not good.
A much better solution would be to use that chicken and make Chicken Burrito Bowl.
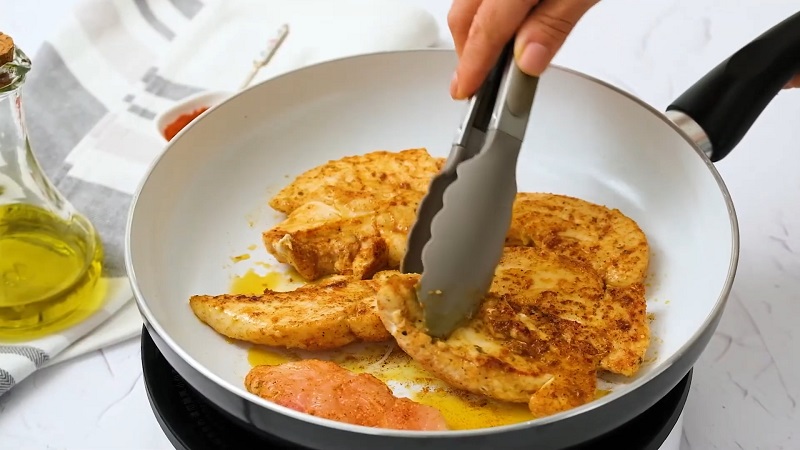
4. Skillet Reheat – High Heat, High Risk
Rating: 6/10
The skillet gives fast, direct heat. When done right, it revives some crunch and adds a little sear. When rushed, it burns the outside and leaves the center cold. There is a fine line between crispy and dried out.
Step-by-Step Instructions
- Heat a nonstick skillet on medium heat
- Add a teaspoon of oil or butter
- Place tenders flat in the pan, not touching
- Reheat for 3 to 4 minutes per side
- Flip once when golden and heated through
What Works Best in the Skillet
- Thinner chicken tenders
- Light breading or grilled versions
- Small batches
- Leftovers that dried out slightly
Avoid thick breaded tenders. The inside may stay cold by the time the outside browns. Also avoid nonstick sprays if using butter. The mix burns easily.
When to Use the Skillet
- You want a crispy outside with control
- No oven or air fryer available
- You like hands-on reheating
- Cooking for one or two people
Pros and Cons
- Crispy outside with right technique
- Adds seared flavor
- No special gear needed
- Works fast for small servings
- Easy to burn the coating
- Must stand over the pan the whole time
- Can dry out the inside quickly
- Not ideal for thick or breaded tenders
The skillet gives good results if you put in the effort. Not the best choice for large batches or multitasking. You must watch every second. Great for grilled or light breaded tenders. Not great for fast food leftovers. Think of it as a method for flavor tweaks, not full revival.
5. Toaster Oven Reheat – Compact but Capable
Rating: 7/10
The toaster oven handles reheating well in a small space. Results come close to oven quality without needing to heat the whole kitchen. Crisping is solid. Inside stays soft. Timing is quicker than a full oven. It works best with mid-size tenders.
Step-by-Step Instructions
- Preheat toaster oven to 375°F
- Place tenders on foil or tray
- Leave space between each one
- Reheat for 8 to 10 minutes
- Flip once halfway through
What Works Best in the Toaster Oven
- Medium-sized tenders
- Fast food leftovers
- Crisp breading, not heavy coating
- Smaller meal portions
Avoid using this for frozen tenders unless fully thawed. The heat is not even enough to warm the inside properly. Also not ideal for very thick pieces that need deep heat.
When to Use the Toaster Oven
- You want better texture without heating a full oven
- Small lunch portions
- Kitchen space is limited
- Good balance between time and texture
Pros and Cons
- Compact and convenient
- Good texture for small batches
- No need for full oven setup
- Great for fast food leftovers
- Slower than air fryer
- Limited space
- Uneven heating in some models
- Crisping weaker on thick tenders
Toaster ovens often get overlooked, but they can deliver. You get near-oven quality in less time. The crispiness feels real, not forced. Not ideal for big families or massive leftovers, but perfect for solo lunches. A little slower than an air fryer, but easier cleanup and more control.
6. Oven + Broiler Combo – Extra Crunch with Precision

Rating: 8/10
This method uses two levels of heat. The oven warms the inside slowly. The broiler revives the outer crisp. It feels like the oven, but with a sharper finish. The extra step adds effort, but the results stand out.
Step-by-Step Instructions
- Preheat oven to 350°F
- Place tenders on a wire rack or foil-lined tray
- Heat in the oven for 7 to 8 minutes
- Turn on broiler for the final 1 to 2 minutes
- Watch closely to avoid burning
What Works Best in the Combo Method
- Thick breaded tenders
- Homemade or oven-fried styles
- Food with uneven texture
- Leftovers that feel dull
Avoid already dry or thin tenders. The broiler will ruin them. Do not use this method with foil covering the tray. That traps steam and kills the crisping effect.
When to Use Oven + Broiler
- You want top-tier crispiness
- Lunch at home with no rush
- Reheating for guests
- Final touch matters to you
Pros and Cons
- Works well for homemade tenders
- Better texture than oven alone
- Crispy without deep frying
- Sharp, restaurant-style finish
- Easy to over-broil if not careful
- Two heat settings to manage
- Takes time and attention
- Not ideal for dry or thin leftovers
Oven plus broiler gives the best crunch without frying in oil. It takes more timing and focus, but the payoff works. Every time you do it right, the breading feels fresh and the taste comes back strong. It is not lazy reheating. It is reheating with pride.
Last Words
Chicken tenders do not deserve a sad second life. If the breading feels limp and the center tastes like fridge, you picked the wrong method. The oven brings them back almost like new. The air fryer gives you crunch without the wait. The toaster oven holds its own in tight kitchens. The skillet? Great if you can babysit it. The broiler combo? Serious reward if you have the nerve. The microwave? Only use it if nothing else exists.
No method saves a bad tender. But the right one turns leftovers into a real lunch, not a regret.
Hi there, my name is Kelly Barlow and kellytoeat.com is my blog. Here, I write about various recipes I want to reccommend to readers.
I try to find the best possible recipes that can attract the attention of readers, and at the same time, I strive to write it in the most engaging manner possible.
When I was younger, I wanted to become a chef. Sadly, it wasn’t meant to be, but at the very least, I write about it.